The whole project took me about 1.5 hours, but that's because I had to figure out what, where and how I was going to run the wires, put the camera etc.
Equipment Installed: Both Bought at Amazon.com
Equipment Installed: Both Bought at Amazon.com
- Camera - Night Vision Parking Car Rear View Wide Angle LED Reversing CMOS Camera $25.94
- LCD Monitor - RCA AV Color 4.3 Inch LCD TFT Monitor Screen $15.70
**FYI - There are no wires for the original OEM camera**
**FYI- The power wire is not long enough, will need to run additional low voltage cable**
**FYI- The Video Cable was able to reach my dash with no problem**
**FYI- The power wire is not long enough, will need to run additional low voltage cable**
**FYI- The Video Cable was able to reach my dash with no problem**
1 Here is a picture of what the back looks like without the camera.

2. I decided to place the camera where the original OEM camera goes. There is a plastic cover, covering the hole of the original OEM camera. Right between the "LO" in EXPLORER.


 19. I then pulled the whole lighting case out. I was trying to figure out where I was going to connect my power wires for the camera.


 24. I found the wires going to my rear lights, then spliced the cables from the side closer to the hole, where they come through. I used the blue and black that were side by side.


25. I then had to figure out how to run my wires from within the cabin into the rear door. I followed the existing cables and found this right on top of the door.


 27. I then forgot about my video cable so I ran another small piece of low voltage cable so I could then attach my video cable to it and use it as a guide, because the ends of the video cable are thicker is harder to get through the whole without a guide.

 28. I had to use needle nose pliers to open the hole wider so that the thickness of the video cable could go through. Once it went through, it was all simple to run out to the camera.


3. I took all of the rear door plastic covers off. They just pop out, so you will have to pull a bit hard to get them off.

4. In order to get the big cover off, you need to remove the handle first. There is a cover on the handle and inside there are two 5/16 I believe bolts. Remove those first and you will have no problem removing the rest.


5. In order to remove the EXPLORER trim, you have to remove the four bolts that are underneath the trim outside and inside, it has two more bolts.


6. Here is an inside and bottom view of where the OEM camera goes and the cover in place now.


7. I removed the cover and that's where I decided to mount my camera.

8. Here are some pictures of the camera.


9. Here is the camera mounted to the plastic cover, covering the OEM hole. As you will see, I did make a small cut to fit the wire into the trim. Then I found out it was backwards. **double check your work**


10. So, here it is the right way.


11. I had to cut the right hand side screw, in order to get it to fit into the hole. Also, I used screws and those metal clips to hold the screws. (don't know what the metal clips are called, I just had them)

12. Here is the camera mounted to the trim and what it looks from the inside.


13. I then had to figure out how to get the wires into the Vehicle. So, I decided the best way (other than drilling holes) would be to use what was there already. There is a hole, where the License plates light wires come out. So I took that out. I also had to remove the wires from the trim. It's easy to put back together.

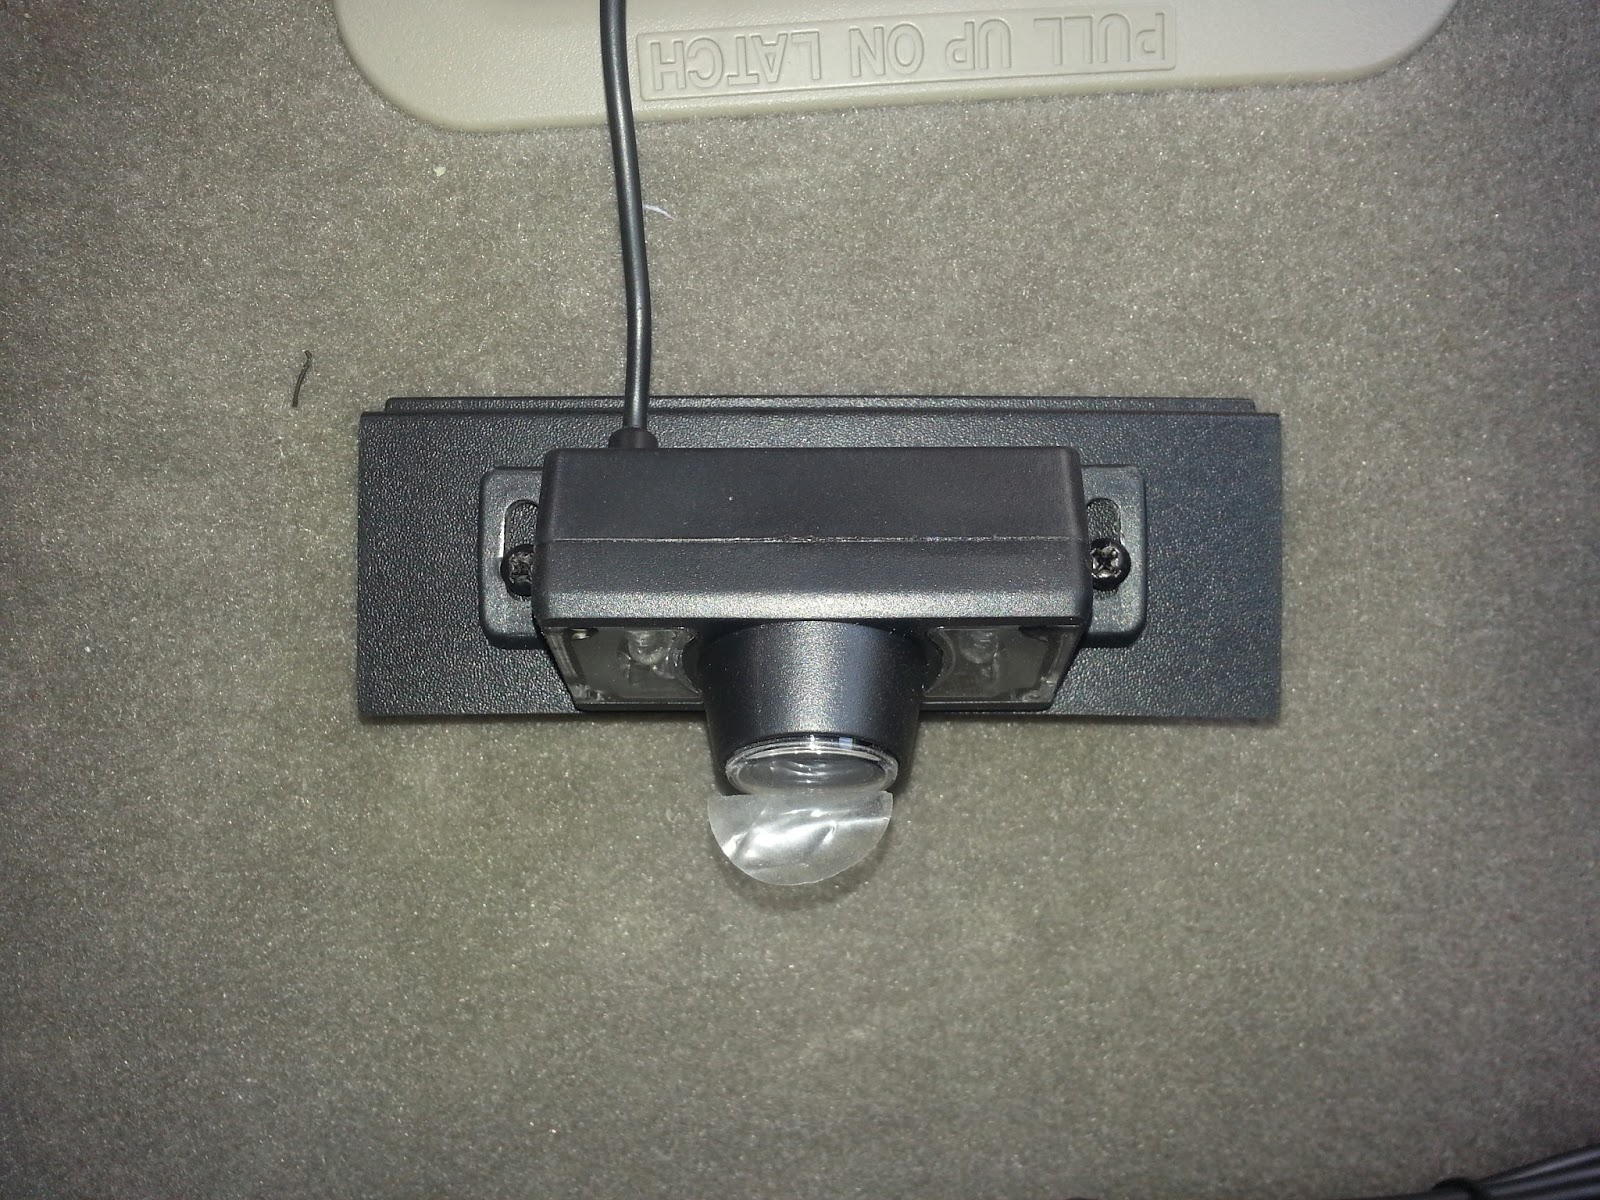
14. Here is the wire from the license plate lights.


15. I decided to cut the plastic so that I could fit the wire coming from the camera into the vehicle. I then taped the plastic and the other wires with the camera wires.

16. Here is what it looks like put together from the inside.

17. This is the camera mounted to the trim. (no power yet)

18. Since it's a backup camera, I decided I wanted the camera to turn on while the vehicle was put in reverse. I took the two bolts for the face of the back left lights.


20. Found this plastic covering the hole and it had wires coming out of the vehicle.

21. I have a box of low voltage cable, so I decided to use that to connect my camera. I ran the cable from a hole found on the left hand side. Just take the plastic panel off.


22. I was then able to feed trough the hole of where the light wire go through.

23. I then made a small hole on the plastic cover and ran the wire through there.


26. I took both ends out and made a small cut to the bottom of the plastic and decided to run my wires from the inside of the cabin out to the door. I ran all the wires through the ceiling. **FYI- I did split the power wire inside the cabin, so that I could run power for my monitor as well.**


29. Here I plugged the power and video cables to the other ends. I put tape around them, so they would not come apart or create a short.

30. Here is the camera mounted and ready to go on the Explorer.

31. I also ran wires from the backup lights to my monitor, all of these cables went from the back to the front through the edge of the left hand ceiling.

I could have probably found a fuse to the backup lights, but didn't have time or wanted to mess around with the switch box. So I just split the cable inside the cabin and one went to the camera and the other to the Monitor.
Now they both turn on when I put it in reverse, of course it takes about a second for the monitor to turn on, but the picture quality is very clear and in HD. It has a wide angle as well. I will post a picture of the Monitor in reverse later on.

**FYI - If you can get a rear view mirror with an LED monitor built into it, then that would by my best option, though I could not find a cheap one with a good review on amazon. If you find one let me know.**
Thanks for viewing. Hope you enjoyed it. Stay tuned for my next project which will be installing fog lights and the OEM light switch to turn them on.